
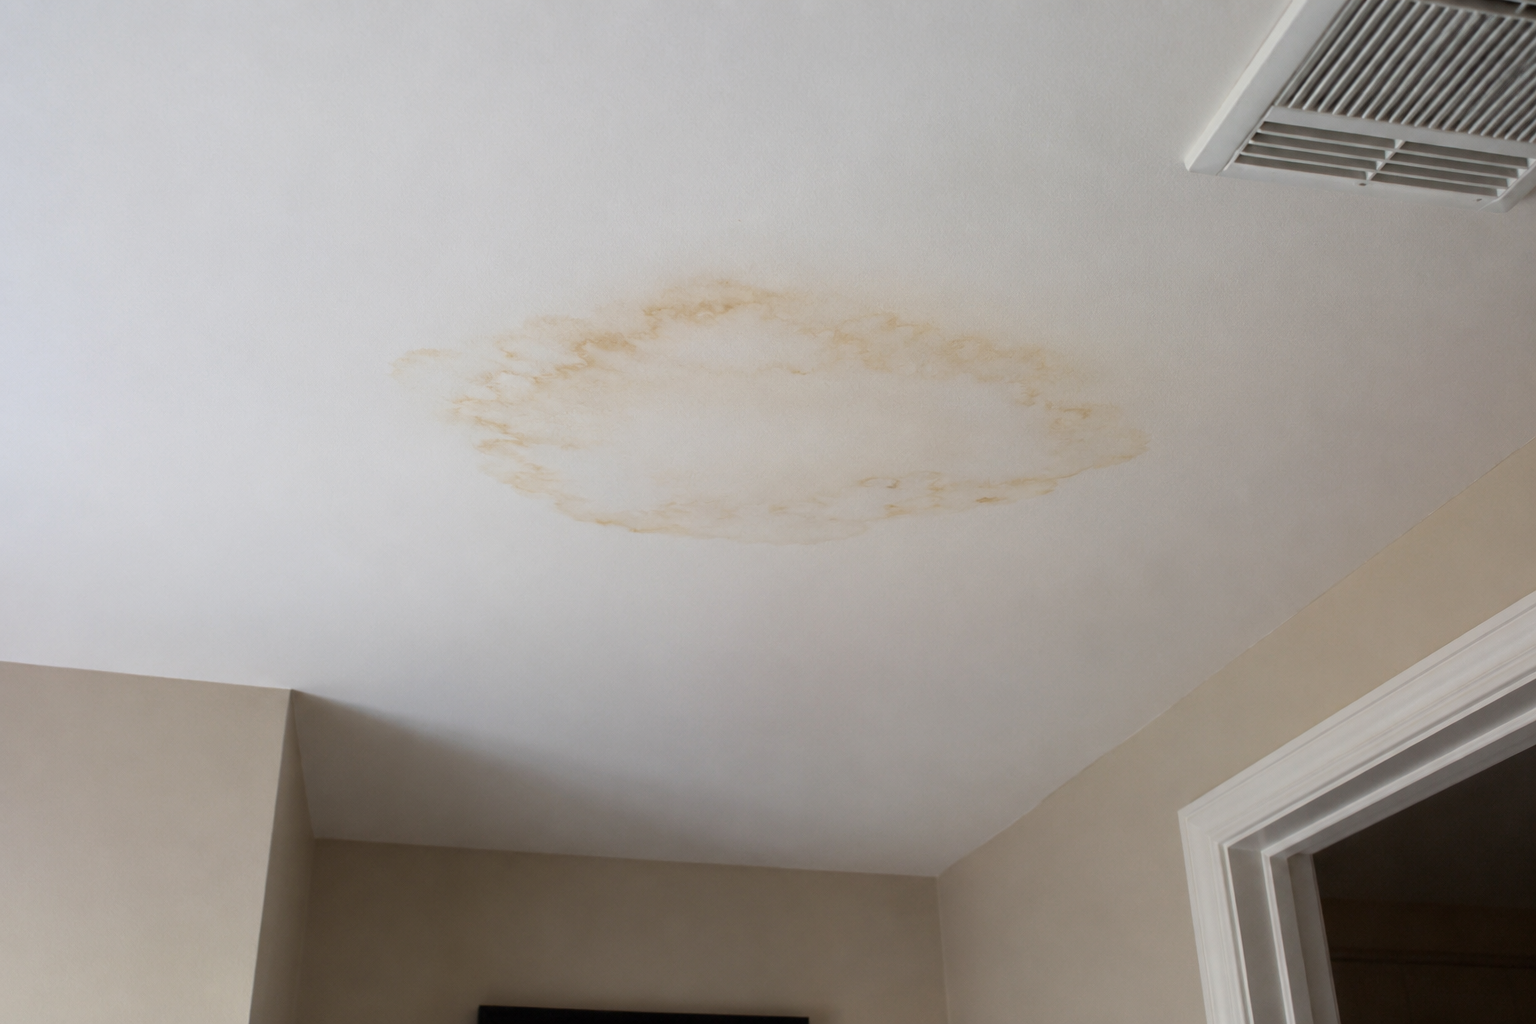
Few things are more frustrating than repairing a water stain on your ceiling or wall only to watch the same yellow or brown discoloration slowly return a few months later.
Many homeowners assume the repair failed because the drywall patch wasn’t done correctly or the wrong paint was used. Sometimes that’s the case. More often, though, the stain is telling you that the original problem was never completely solved.
That’s an important distinction.
The stain itself isn’t the problem. It’s evidence that something happened—or is still happening—inside the wall or ceiling.
Before talking about drywall repair, you should ask yourself a different question:
Why did the drywall become water damaged in the first place?
That question often determines whether your repair lasts for years or whether you’re repainting the same spot again next season.
Water Damage Is Usually a Symptom, Not the Whole Problem
One of the biggest mistakes people make is treating water damage like a drywall problem.
It’s usually a moisture problem that happens to show up on drywall.
Imagine placing a towel under a leaking pipe. The towel gets wet, but the towel isn’t the source of the leak.
Drywall works the same way.
When water travels through your home’s structure, gravity carries it until it reaches a surface where it becomes visible. That visible stain may be several feet away from where the water actually entered.
In homes throughout Worcester, it’s common to see water damage caused by:
- Roof leaks
- Ice dam damage after winter storms
- Plumbing leaks inside walls
- Bathroom or laundry overflows
- Window flashing failures
- Condensation in poorly ventilated spaces
- HVAC drain problems
Every one of these situations can leave nearly identical stains on drywall, even though each requires a different solution.
That’s why professional repairs begin by identifying the moisture source—not by opening a bucket of joint compound.
Why Water Stains Come Back After They’re Repaired
Homeowners often tell me something like this:
“We fixed this six months ago. Why is the stain back?”
That’s actually one of the most useful clues.
A stain that returns usually suggests one of several possibilities.
The Leak Was Never Completely Fixed
This is the most common reason.
Maybe the roof repair solved most of the problem but not all of it.
Perhaps a plumbing fitting still drips occasionally.
Maybe water only enters during wind-driven rain or when snow begins melting.
These intermittent leaks can be difficult to notice because they aren’t always active.
The drywall simply records the evidence over time.
Moisture Was Trapped Inside the Ceiling
Sometimes the water source is corrected, but repairs begin before everything has dried completely.
Drywall, insulation, framing, and joint compound all hold moisture differently.
If materials remain damp when they’re sealed behind fresh paint, residual moisture can continue affecting the surface.
Drying isn’t something that happens because a calendar says enough time has passed.
It happens when the materials themselves have actually dried.
The Existing Drywall Was Too Damaged to Save
Not every water-damaged ceiling requires replacement.
Not every ceiling can be successfully repaired either.
Drywall loses strength as it absorbs water.
If the gypsum core has softened, crumbled, sagged, or separated from the paper facing, simply covering the damage with compound won’t restore its structural integrity.
The goal isn’t just to make the surface look smooth.
It’s to restore a wall or ceiling that’s stable enough to remain that way.
The Wrong Primer Was Used
This surprises many homeowners.
Standard latex primer isn’t designed to permanently lock in water stains.
Even after the moisture problem has been corrected, minerals, tannins, rust, and other contaminants can migrate through ordinary primer and paint.
When that happens, the stain slowly reappears despite looking perfectly repaired when the job was finished.
That’s why stain-blocking primers are an essential part of many water damage repairs—not an optional upgrade.
Before Repairing Drywall, Confirm That the Water Is Gone
This step isn’t the most exciting.
But it is the most important.
Repairing drywall before confirming the moisture source has been corrected is a little like repainting a car while the engine is still leaking oil.
The finish may look great.
But the underlying issue continues.
A responsible repair starts by asking:
- Has the roof leak actually been repaired?
- Is the plumbing leak completely resolved?
- Has the damaged area dried thoroughly?
- Is there any active moisture remaining?
- Could another source still be contributing?
Only after those questions have been answered with a yes, does it make sense to repair the drywall itself.
Skipping this step often creates the cycle many homeowners experience:
Repair.
Paint.
Wait.
See the stain return.
Repeat.
The drywall wasn’t necessarily the problem.
It was simply where the moisture finally became visible.
How to Evaluate Whether the Drywall Can Be Repaired
Not every water-damaged section has to be replaced.
Likewise, not every damaged area should be repaired.
The decision depends on the condition of the material—not just its appearance.
When evaluating drywall after water damage, I look for several things.
Is the Drywall Still Firm?
Press gently near the damaged area.
If the drywall feels solid and stable, repair may be possible.
If it feels soft, spongy, or begins crumbling, replacement is the better option.
Has the Paper Surface Delaminated?
The paper facing provides much of drywall’s finished strength.
When prolonged moisture causes the paper to bubble, peel, or separate from the gypsum core, repairs become less reliable.
Even if the surface can be made smooth again, the underlying material may no longer perform as intended.
Is There Visible Mold or Ongoing Moisture?
Visible mold growth, persistent dampness, or signs of continuing water intrusion should be addressed before cosmetic repairs begin.
Simply covering these conditions doesn’t solve them.
It hides them.
Step-by-Step Drywall Repair After Water Damage
Once you’ve confirmed the source of the water has been corrected and the affected area has completely dried, you can determine the best way to restore the drywall.
The exact repair depends on how much damage the water caused, but the goal is always the same:
Restore both the appearance and the performance of the wall or ceiling—not just cover the stain.
Step 1: Remove Damaged Material
The first decision isn’t whether to patch the drywall.
It’s whether the existing drywall is still worth saving.
If the drywall remains solid, flat, and structurally sound, a repair may be all that’s needed.
If it has become soft, swollen, sagged, or begun breaking apart, replacement will provides a more reliable long-term result.
Trying to save drywall that has lost its integrity often creates more work later because the finish may crack, sag, or continue deteriorating beneath the paint.
Step 2: Allow the Area to Dry Completely
This step is often rushed.
Water doesn’t leave every building material at the same rate.
While the drywall surface may feel dry to the touch, moisture can remain inside framing, insulation, or concealed cavities for much longer.
Professional repairs begin only after the affected materials have had enough time to dry.
In some situations, additional drying equipment or moisture testing may be needed before reconstruction begins.
The objective isn’t simply waiting a certain number of days.
It’s confirming the building materials have actually dried.
Step 3: Clean the Surface
Water frequently leaves behind more than discoloration.
Depending on the source, it may also leave dust, minerals, contaminants, or residue that can interfere with primer adhesion.
Loose drywall paper should be removed carefully.
Damaged surfaces should be cleaned and stabilized before any repair compounds are applied.
Good finishes begin with stable surfaces.
Step 4: Repair or Replace the Drywall
The repair method depends on the amount of damage.
Small areas may only require removing loose material, applying joint compound, sanding, and feathering the repair into the surrounding surface.
Larger damaged sections often perform better when the affected drywall is cut out and replaced.
The objective is not simply making the repair invisible today.
It’s making sure it remains invisible years from now.
Step 5: Prime With a Stain-Blocking Primer
This is one of the most important steps in the entire process.
Even after the leak has been repaired and the drywall restored, discoloration trapped within the drywall or joint compound can migrate back through ordinary paint.
Many homeowners discover this the hard way.
The ceiling looks perfect.
A few weeks later, the faint yellow stain begins showing through again.
That’s why stain-blocking primer isn’t simply another coat of paint.
It’s designed to isolate the discoloration beneath the finish coat so it doesn’t continue affecting the finished surface.
Skipping this step often means repeating the entire painting process later.
Step 6: Apply the Finish Paint
Only after the primer has fully cured should finish paint be applied.
Matching the existing texture, sheen, and color is often what separates an obvious repair from one that blends naturally with the rest of the room.
For ceiling repairs, repainting the entire ceiling often provides a more consistent appearance than touching up a small area, particularly if the existing paint has aged over time.
Repair or Replace? Making the Right Decision
One question homeowners ask frequently is:
“Can this drywall be repaired, or does it need to be replaced?”
There’s no single measurement that answers that question.
Instead, I look at how well the drywall can still perform its intended job.
Repair usually makes sense when:
- The drywall remains firm.
- The damage is localized.
- The paper facing remains intact.
- The leak has been corrected.
- The area has dried completely.
Replacement becomes the better option when:
- The drywall has softened significantly.
- The gypsum core is deteriorating.
- Large sections have sagged.
- Mold contamination requires removal.
- Multiple previous repairs have already weakened the area.
The least invasive responsible repair is usually the best one.
But “least invasive” doesn’t mean preserving materials that can no longer perform reliably.
It means preserving sound materials whenever doing so still produces a durable repair.
Common Mistakes That Cause Water Stains to Return
Over the years, I’ve seen many recurring repairs that weren’t caused by poor workmanship alone.
Most happened because an important step was skipped.
Here are some of the most common reasons stains come back.
Painting Before Solving the Leak
Fresh paint doesn’t stop water.
Until the moisture source is corrected, every cosmetic repair is temporary.
Repairing Wet Drywall
Joint compound, primer, and paint perform best over dry, stable materials.
Sealing moisture inside the wall or ceiling increases the likelihood of future problems.
Using Standard Primer
Ordinary primer often allows stains to bleed back through.
The repair may initially appear successful before discoloration slowly returns.
Replacing Drywall Without Addressing the Cause
New drywall installed beneath an active roof leak eventually becomes old water-damaged drywall.
Replacing materials without correcting the condition that damaged them rarely changes the outcome.
Ignoring Hidden Damage
Sometimes the visible stain represents only a small portion of the affected area.
Water can travel along framing members, insulation, pipes, or ceiling cavities before becoming visible.
That’s one reason professional inspections often extend beyond the stained area itself.
Worcester Homes Present Their Own Challenges
Many homes throughout Worcester and the surrounding communities have characteristics that influence water damage repairs.
Older homes may contain a combination of plaster and drywall from different remodeling periods.
Some have experienced decades of additions, previous repairs, or renovations that make water paths less predictable.
Newer homes aren’t immune either.
Our New England climate regularly subjects homes to:
- Heavy snow loads
- Ice dams
- Freeze-thaw cycles
- Wind-driven rain
- High seasonal humidity
A ceiling stain that appears during February may have very different causes than one appearing after a summer thunderstorm.
Understanding those seasonal patterns helps explain why simply repairing the drywall isn’t always enough.
The moisture system deserves equal attention.
When It’s Time to Call a Professional
Many small drywall repairs are well within the abilities of experienced homeowners.
The decision becomes different when uncertainty remains about what caused the damage.
Professional evaluation is often worthwhile when:
- The stain continues returning.
- The leak source hasn’t been identified.
- The drywall feels soft or unstable.
- The damaged area is extensive.
- Ceiling repairs require replacing large sections.
- Mold or persistent moisture is suspected.
- The repair involves matching existing textures.
Sometimes the most valuable part of the visit isn’t the repair itself.
It’s confirming that the moisture problem has actually been solved before restoration begins.
That confidence often prevents repeated repairs and unnecessary expense later.
A Lasting Repair Starts Before the Drywall Work
Water-damaged drywall is easy to notice.
Understanding why it became damaged is where lasting repairs begin.
The most successful drywall repair after water damage doesn’t start with joint compound or paint. It starts with careful observation.
Where did the water come from?
Has that source been corrected?
Are the surrounding materials dry and stable?
Can the existing drywall still perform reliably, or has it reached the point where replacement makes more sense?
Once those questions have been answered, the repair process becomes much more straightforward.
That’s why the best long-term repairs don’t simply hide yesterday’s stain. They restore the wall or ceiling only after the conditions that caused the damage have been addressed.
For homeowners in Worcester, where roofs, plumbing systems, older construction methods, and New England weather all influence how moisture moves through a home, taking the time to understand the situation first often leads to repairs that last far longer than cosmetic fixes alone.
Not every water stain requires replacing drywall, and not every stain can be solved with paint. The first step is understanding what’s actually happening.
If your ceiling or wall stain keeps coming back, you’ve recently discovered water damage, or you’re unsure whether the drywall can be saved, contact Drywall Paint Plus at (508) 981-3254 to schedule a professional evaluation. We’ll determine where the moisture came from, assess the condition of the drywall, explain your repair options, and help you choose the solution that makes the most sense for your home—not simply the biggest repair.
Call (508) 981-3254 today to schedule your evaluation and get a repair plan designed to solve the problem, not just cover the stain.
Frequently Asked Questions
How do I know if water-damaged drywall needs to be replaced instead of repaired?
The condition of the drywall matters more than the size of the stain. If the drywall is still firm, structurally sound, and completely dry after the leak has been corrected, a repair may be appropriate. If it has become soft, swollen, sagging, or the paper facing has separated from the gypsum core, replacement usually provides a more durable long-term solution.
Can I paint over a water stain without repairing the drywall?
You can, but it usually won’t solve the problem.
If the moisture source hasn’t been corrected or a stain-blocking primer isn’t used, discoloration often bleeds back through the paint. Even if the stain disappears temporarily, it may return weeks or months later.
Will water stains always come back?
Not if the underlying cause has been corrected and the repair is completed properly.
A lasting repair generally requires:
- Fixing the moisture source
- Allowing materials to dry completely
- Repairing or replacing damaged drywall as needed
- Applying a quality stain-blocking primer
- Finishing with the appropriate paint system
When each step is completed correctly, recurring stains become much less likely.
How long should drywall dry after water damage?
There’s no single timeline that applies to every situation.
Drying depends on:
- The amount of water involved
- Indoor humidity
- Air movement
- Temperature
- Whether insulation was affected
- The construction of the wall or ceiling
Rather than relying on the calendar, it’s better to verify that the materials themselves have dried before beginning repairs.
Can water-damaged drywall grow mold?
It can if moisture remains long enough.
Not every water stain means mold is present, but prolonged moisture creates conditions where mold can develop. If there is visible mold growth, persistent dampness, or uncertainty about hidden moisture, the underlying condition should be evaluated before cosmetic repairs begin.
Does homeowners insurance cover drywall repair after water damage?
Sometimes.
Coverage generally depends on what caused the damage. Sudden and accidental events may be covered, while damage resulting from long-term leaks or deferred maintenance may not be. Review your policy and speak with your insurance provider if you’re unsure how your situation is handled